Good hip thrust form starts with the setup: the lower edge of your shoulder blades on a bench about knee height, the bar padded and sitting in the crease of your hips, feet flat and hip-width apart so your shins are vertical at the top. From there, tuck your chin, brace, and drive through your heels until your hips are fully extended, with your torso and thighs in a straight line and your ribs down, then lower under control. Below is each step, the mistakes that send the work to your back or hamstrings, and when to choose a glute bridge instead.
Step-by-step hip thrust setup
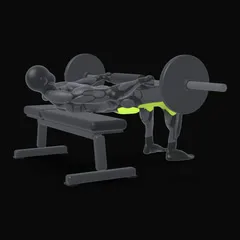
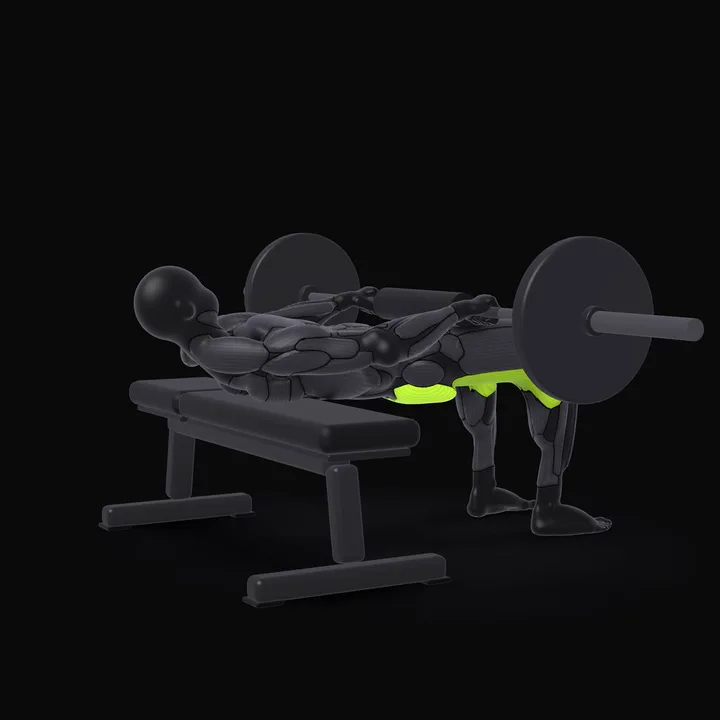 Barbell Hip ThrustSit on the floor with your upper back against the edge of a bench and the bar over your hips, using a pad. Bend your knees and plant your feet flat on the floor.How to do the Barbell Hip Thrust →
1. Bench and position
Use a flat bench about knee height (40–45 cm / 16–18 in), placed against a wall or a heavy rack so it can’t slide. Sit on the floor with your back against the long side of the bench. The bench edge should sit just below your shoulder blades.
2. Bar and pad
Roll a loaded bar over your legs until it sits in the crease of your hips. Use a thick bar pad or folded mat. With 20 kg (45 lb) plates the bar is high enough to roll over your thighs easily; with smaller plates, put them on blocks or use a bench-and-pad setup.
3. Feet
Feet flat, about hip-width apart, toes slightly out. Place them so that at the top of the movement your shins are vertical. Test it with an empty bar: if you feel your hamstrings most, move your feet closer; if you feel your quads most, move them away.
4. Hands and head
Hold the bar with both hands just outside your hips to keep it from rolling. Tuck your chin slightly and look forward, not up at the ceiling. Your head moves with your torso throughout the rep.
5. Brace and lift
Brace your midsection and push through your heels (or whole foot) to lift your hips until your thighs and torso form a straight line. Your upper back pivots on the bench; your torso and head stay in line with each other.
6. Squeeze and lower
At the top, squeeze your glutes for a second, ribs down, pelvis slightly tucked. Lower until your hips are a few centimetres off the floor, then go again.
Quick setup checklist
Before each set, run through it in this order. It takes ten seconds and saves most bad reps:
- Bench braced against something solid, edge just below your shoulder blades.
- Bar padded and sitting in your hip crease.
- Feet hip-width, toes slightly out, shins vertical at the top.
- Hands on the bar, chin tucked, eyes forward.
- Brace, then the first rep.
Cues for each phase
- Bottom: “Sit down between your heels.” Lower until your hips nearly touch the floor without losing your chin tuck.
- Drive: “Push the floor away through your heels.” Think of the floor as a sled you’re pushing forward.
- Lockout: “Ribs down, squeeze.” Finish with your glutes, not your lower back. Imagine tilting your pelvis slightly back at the top, like tucking your tail.
- Lowering: “Control it.” About 2 seconds down; dropping into the bottom takes the tension off your glutes.
Warm-up
Two or three minutes is enough: 15 bodyweight glute bridges with a pause at the top, a 30-second hip flexor stretch per side, then a set of 10 with the empty bar or a light dumbbell, and two quick ramp-up sets on the way to your working weight.
The most common hip thrust mistakes
| Mistake | What you’ll feel | Fix |
|---|---|---|
| Arching the lower back to finish | Lower back strain | Chin tucked, ribs down; stop at full hip extension |
| Feet too far away | Hamstrings cramping | Bring feet closer; shins vertical at the top |
| Feet too close | Quads burning | Move feet slightly away |
| Short reps | Little glute work | Full lockout each rep; reduce the weight |
| Bar on the hip bones | Pain, bruising | Bar in the hip crease, thick pad |
| Head looking at the ceiling | Neck strain, back arching | Chin tucked, eyes forward |
| Pushing through the toes | Quads take over, heels lift | Push through heels or the whole foot |
Hip thrust vs glute bridge
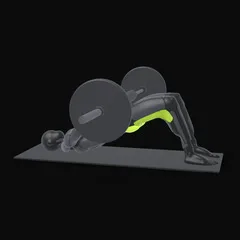
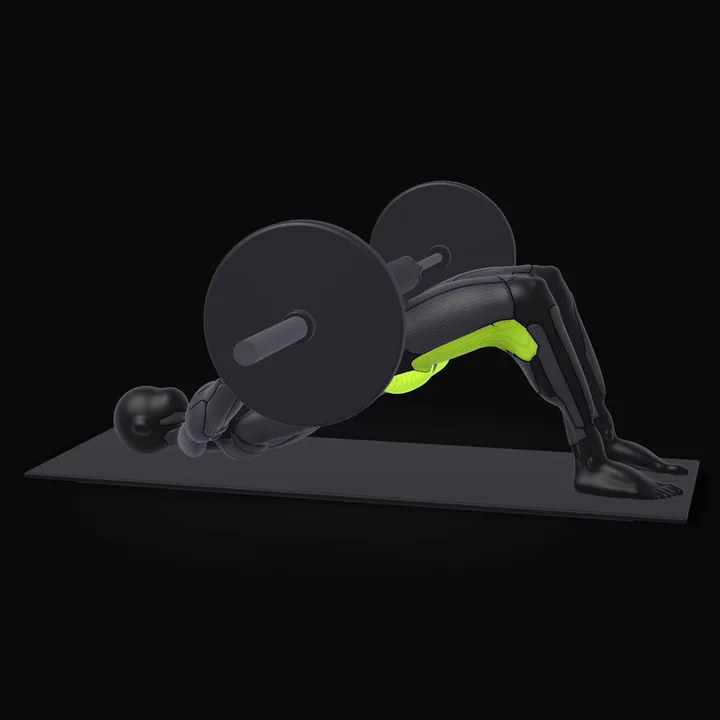 Barbell Glute BridgeLie on your back on the floor with the bar across your hips, using a pad. Bend your knees and plant your feet flat.How to do the Barbell Glute Bridge →
| Hip thrust | Glute bridge | |
|---|---|---|
| Back position | Upper back on a bench | Shoulders on the floor |
| Range of motion | Longer | Shorter |
| Setup | Bench, bar pad | Floor only |
| Good for | Main glute exercise, heavy loads | Home training, warm-ups, beginners |
The barbell glute bridge is easier to set up and loads the top of the movement similarly; the hip thrust gives you more range. Both are good. The bodyweight glute bridge is a great starting point or warm-up.
How good are hip thrusts for the glutes?
Hip thrusts became popular partly because of a study showing higher glute activity in the barbell hip thrust than in the back squat in trained women (Contreras et al., 2015). When glute growth was measured directly over 9 weeks, though, hip thrusts and squats produced similar glute growth, and squats also grew the quads more (Plotkin et al., 2023).
So hip thrusts are an excellent glute exercise, especially for loading the glutes at full hip extension with little fatigue for your back and knees. They work best alongside squats or lunges and a hinge. The full picture is in how to grow glutes.
Variations
- Single-leg hip thrust: no barbell needed, great at home. One foot down, the other knee up.
- Dumbbell hip thrust: a dumbbell in the hip crease; easy setup for moderate loads.
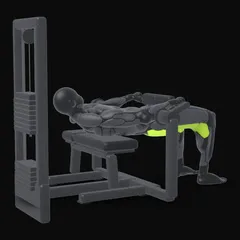
- Hip thrust machine: the easiest setup and very comfortable; perfect for higher reps.
- Smith machine hip thrust: stable bar path.
- Banded hip thrust: a band around your knees adds some side glute work; push your knees out against it.
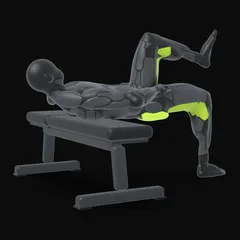
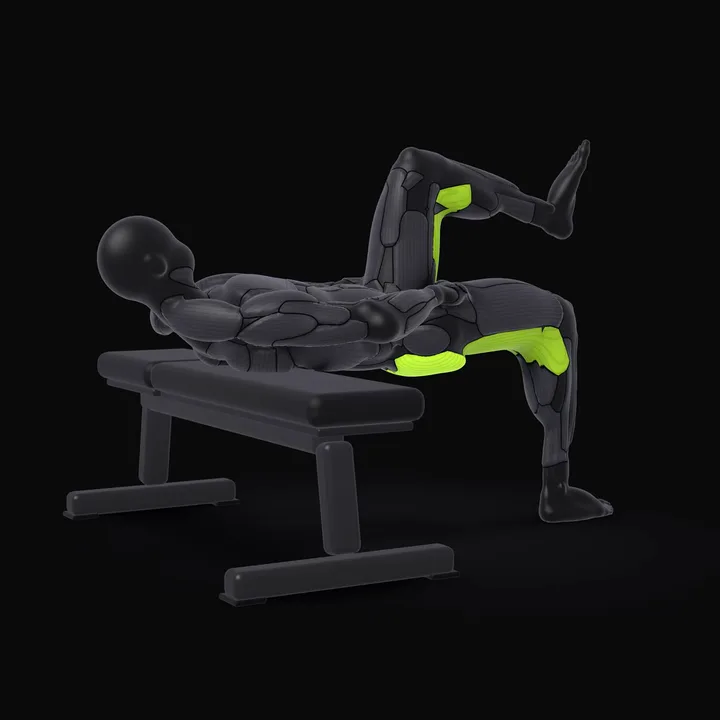 Single-leg Hip ThrustRest your upper back on the edge of a bench with one foot on the floor and the other leg lifted. Drive through the heel of your working leg and lift your hips until your torso is parallel to the floor.How to do the Single-leg Hip Thrust →
Sets, reps and progression
- Frequency: 1–3 times a week as part of your lower body training.
- Progression: hip thrusts progress fast. Add 5 kg (10 lb) when you reach the top of your rep range with full lockout on every rep.
Watch your range as the weight goes up: a hip thrust that gets heavier but stops 10 cm short of lockout isn’t progress. A quick note in your log, like “full lockout” or “short on last 2”, keeps you honest.
How to pick your starting weight
Start with the empty bar (or a 10–20 kg dumbbell) for a set of 10 to check your foot position and lockout. Then add 10–20 kg per set until a set of 10 feels hard but every rep still reaches full lockout with a 1-second squeeze. Most people’s first working weight lands somewhere between 40 and 80 kg, and climbs quickly over the first months.
| Goal | Sets × reps | Rest |
|---|---|---|
| Learning the setup | 2–3 × 10–12, light | 90 s |
| Glute size | 3–4 × 8–12 | 2 min |
| Strength | 3–5 × 5–8 | 2–3 min |
| Finisher | 1–2 × 15–20 on the machine or single-leg | 60–90 s |
A worked example
Week 1 at 60 kg: 12, 10, 9. Week 2: 12, 11, 10. Week 3: 12, 12, 12, so the next session moves to 65 kg and might give 10, 9, 9. That’s progressive overload in its simplest form. If reps drop two sessions in a row, check your sleep and the rest of your leg training before blaming the hip thrust, and repeat the weight rather than adding more.
Safety and getting out from under the bar
Hip thrusts are safe to fail: if you can’t lock out, lower your hips to the floor and the bar comes with you. To get out, sit up and roll the bar back over your thighs, or shift it to one side and slide out. A few things matter more as the weight climbs:
- Anchor the bench. A sliding bench mid-rep is the main real danger. Push it against a wall or a heavy rack.
- Use the same bar position every time. A bar that slips toward your stomach is uncomfortable and unstable.
- Collars on. Your hips aren’t perfectly level every rep, and plates can creep.
Hip thrusts at home
No bench? A sturdy sofa edge works if it doesn’t slide; push it against the wall. Without a barbell, use single-leg hip thrusts, a dumbbell or a backpack in your hip crease, or a resistance band pinned under your hands. Slow the lowering to 3 seconds and pause at the top to make light loads count.
Where hip thrusts fit in your week
Put them on a lower body day after squats or Romanian deadlifts, or lead with them on a glute-focused day. The leg day workout includes them in its hinge-focused session, and the gym workout plan for women uses them in every week.
Frequently asked questions
Why do I feel hip thrusts in my hamstrings?
Your feet are probably too far from the bench. Move them closer so your shins are vertical at the top. If you feel them in your quads, your feet are too close; move them slightly away.
Why do I feel hip thrusts in my lower back?
You're finishing the rep by arching your lower back instead of extending your hips. Tuck your chin, keep your ribs down, and stop when your hips are in line with your thighs and torso.
How heavy should hip thrusts be?
Heavy enough that 6 to 12 reps with a full lockout and a one-second squeeze are hard. Hip thrusts progress quickly, and many people end up thrusting more than they squat.
Is the glute bridge as good as the hip thrust?
Both train the glutes well. The bridge, done from the floor, has a shorter range of motion and is easier to set up; the hip thrust, with your back on a bench, has a longer range. Use the bridge if you have no bench or as a lighter variation.
How do I stop the bar from hurting my hips?
Use a thick bar pad or a folded mat, and position the bar in the crease of your hips, not on your hip bones. Bigger plates (20 kg / 45 lb) also make it easier to roll the bar into place.
Sources
- Contreras B, Vigotsky AD, Schoenfeld BJ, Beardsley C, Cronin J (2015). A Comparison of Gluteus Maximus, Biceps Femoris, and Vastus Lateralis Electromyographic Activity in the Back Squat and Barbell Hip Thrust Exercises. Journal of Applied Biomechanics
- Plotkin DL, Rodas MA, Vigotsky AD, McIntosh MC, Breeze E, Ubrik R, Robitzsch C, Agyin-Birikorang A, et al. (2023). Hip thrust and back squat training elicit similar gluteus muscle hypertrophy and transfer similarly to the deadlift. Frontiers in Physiology